Portable 2m 144 MHz Coaxial Dipole Antenna
A homebrew 2m 144.2 MHz vertical 1/2 wave Coaxial Dipole antenna project for your home QTH, SOTA, portable field operations/WICEN exercises or the emergency 2m Go-box. Elsewhere in amateur radio circles this antenna is known as a 2m Flower Pot Antenna. Credits to VK2ZOI (SK).
Post updated 5 May 2019, scroll to the bottom for details.
Materials:
- 7m length of 50 ohm RG58AU/CU Mil Spec coax
- 1 * 50 ohm BNC connector
- 2 * 1 metre lengths of 27 mm water pipe (Bunnings)
- 1 * End Cap
- 2 * T-piece connectors
- 1 * 110 mm length of 40 mm heat-shrink tube
- 1 * 300 mm Ground Spike (Bunnings)
- 25 mm dowel offcut
- 1 * Guying Ring
Photos and diagrams: © Copyright 2018 Andrew VK1AD
Antenna Diagram
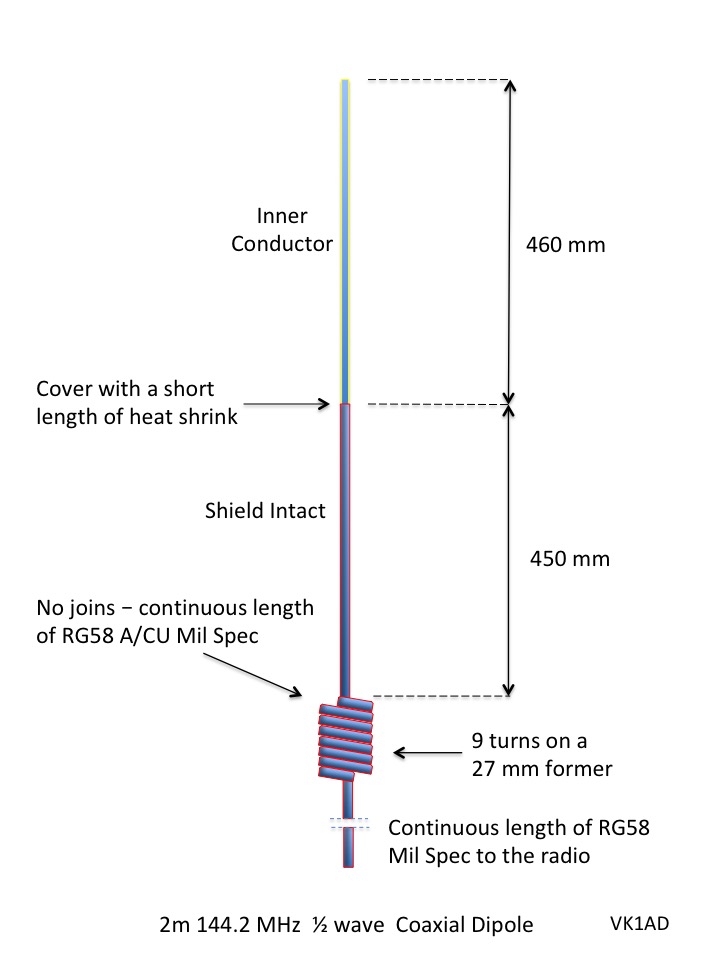
2m 144 MHz coaxial dipole antenna or known elsewhere as a Flower Pot antenna
RigExpert 600 MHz Antenna Analyser VSWR results

VSWR Plot – 126 to 166 MHz

VSWR Plot – 136 to 156 MHz

VSWR Plot – 142 to 150 MHz
Return Loss measurement

Return Loss Plot
Construction Method
Start by removing the braid from the top section exposing the inner conductor. Leave the dielectric insulator intact.

Braid removed from the top section

Top Section 460 mm inner conductor with braid removed
Braid Section 450 mm to the pencil mark. Jacket is intact.


Choke hole spacing = 45 mm (9T x 5 mm)
From the top of the tube measure 918 mm and mark the top hole position. Drill a 2 mm pilot hole followed with a 6 mm drill bit (hole size and spacing will vary with coax diameter). Using a round file, elongate the hole in the direction of the winding. Center-to-center hole space = 45 mm.

Choke winding holes spaced 45 mm
On a 27 mm former the choke section is 910 mm. The length of the choke section will vary with changes in pipe and coax diameter. Do not cut the coax.
Choke Assembly
Starting with the radiator. Feed the radiator section through the top hole towards the top of the antenna, stop feeding once your 450 mm mark aligns with the top winding hole. Look closely at the photo, you can see my pencil mark where the coax enters the tube.
Next wind 9 tight turns around the tube then feed the remaining 5 metres of coax through the bottom winding hole. Be patient this step will take a few minutes.
Holding the pipe in one hand use the other hand to ‘twist’ the cable tight. There should be no slack in the choke.

Choke assembly 9 turns – Weather proof with a length of heat-shrink
I used a short section of dowel to form a center guide for the inner conductor. This helps to keep the radiator section centered inside the tube. Use a short section of fishing line to pull the top section tight. Secure the guide and inner conductor assembly with hot glue. Finally add an End Cap to weather proof the top.


Weather proof End Cap
End Cap
50 ohm BNC connector assembly, I prefer the solder type.

BNC Connector Assembly
Easy to deploy lightweight portable antenna.

2m coaxial dipole terminated with a 50 ohm BNC connector
Ground spike support – Top cylinder section of the spike fits neatly into the plastic T-piece connector (see next photo)

300 mm ground spike
Portable 2m (144.2 MHz) 1/2 wave Coaxial Dipole mounted on a 1 metre extension. To elevate the antenna add additional 1 metre pipe extensions as required. You may need a guying ring a guy ropes for two or more extensions. Place the guying ring over the top T-piece below the 9T choke.
Not shown in the photo, I plan water proof the choke winding with a length of heat-shrink tube. See below.

Flower Pot Antenna – 2m 144 MHz coaxial dipole antenna for portable or fixed installation

Post update 14 January 2019 – 9 turn choke covered by 40 mm heat-shrink
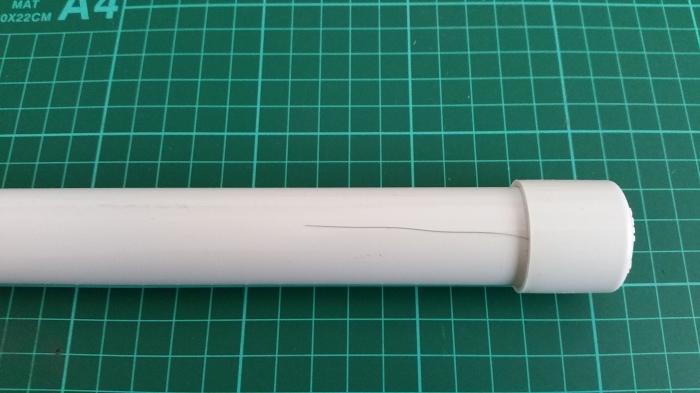
27mm OD water pipe from a local hardware store

27 mm (OD) water pipe
Enjoy constructing your own version of the 2m coaxial dipole antenna known elsewhere in the radio amateur community, for obvious reasons, as a Flower Pot Antenna. Place the bottom 1 metre pipe extension in a flower pot.
Post Update 5 May 2019: If you prefer the antenna to be centered at 145.25 MHz change the two element lengths as follows:
- Top Inner Conductor section 455 mm
- Braid section 445 mm

VSWR plot at 145.250 MHz, top section 455 mm and the braid section is 445 mm
Version made for mounting on a telescopic pole. This option is ideal for the backpack portable or an addition to the emergency 2m Go-box.

2m flower pot antenna center frequency 145.250 MHz. Inner conductor 455 mm and braid section 445 mm.

9 turn choke on a 27 mm diameter form

brass terminal block to support the weight of the antenna against a section of cutting board made as a mounting block


On the other hand if you prefer the antenna to be centered at 146.2 MHz change the element lengths to 450 mm (top section) and 440 mm (braid section)
References:
First published: 10 February 2018
Last Update: 1 February 2021 – VK2ZOI is Silent Key, RIP.